
Dashboard guide
Make it easy to leave useful contact details
Choose when the contact form appears, which details are required and how service and optional marketing choices are presented.

Short answer
Contact settings lets you prepare the details needed for a useful follow-up. Choose whether the form is enabled, when it appears and which name, phone and email fields are required. Review the selected language's wording and consent choices in preview before saving and publishing. Leaving details requests follow-up; it does not guarantee an immediate human reply.
Ask for the information the task needs
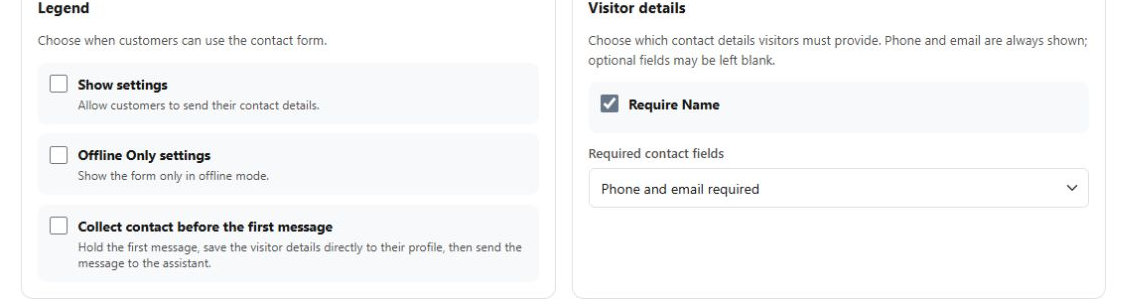
Open Chat widget > Contact and select the customer language. Review the header, description and button wording, then the display conditions. The controls include offline-only display and collecting contact before the first message. Choose the required name and contact-field combination rather than assuming every field must always be mandatory.
Review consent and the visitor experience together
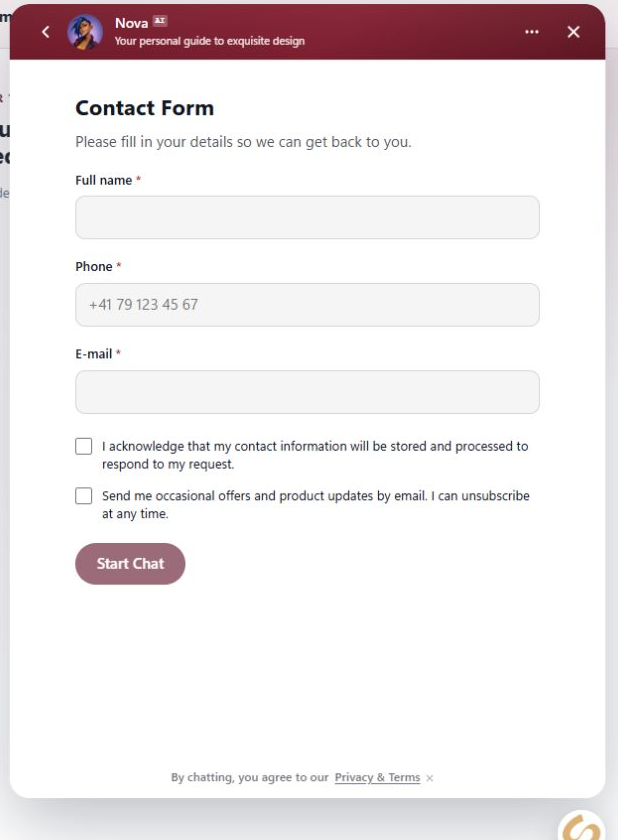
The preview shows the actual form layout with name, phone, email and consent choices. Keep the acknowledgement for handling a service request distinct from optional marketing wording. Save the intended settings, publish the widget and test the relevant online or offline path before relying on it for follow-up.
- A preview can show the form while its live display choice remains disabled.
- Do not treat a contact request as automatic marketing permission.
What you can do
Use the visible controls to review the setup and choose the next step.
- Configure contact-form visibility and offline-only behaviour.
- Review contact-before-first-message handling.
- Choose required name and phone/email combinations.
- Edit service acknowledgement and optional marketing wording.
Continue with the Dashboard guides or your inbox.
Good to know
The contact-field selector offers different required phone/email combinations. Review the selected option and the form preview for your intended flow.
Before you begin
Open the intended workspace and review the current state.
- Check the active workspace and your access.
- Review the relevant information and available controls.
- Verify the result after making an intended change.